Quick Start
Quick Start does only one thing: first make a random photo button successfully load remote images in the scene.
This will not explain too much theory. You can finish the steps first, confirm that it runs successfully, then come back to read other content.
0. Requirements
Section titled “0. Requirements”Prepare several direct image links with resolution <=2048 x 2048. Direct links often end with an image format such as .jpg, .png, .gif, .webp. For more detailed image requirements, see the official VRChat documentation https://creators.vrchat.com/worlds/udon/image-loading/
Using jpg format and images around 1024 resolution is recommended for better network transmission, storage, and game performance experience
You can search the web to get direct image links, upload your own images to an image host to get direct links, or use a GitHub repository or CloudFlareR2 to create a long-term stable personal image host. Click here to learn more about personal image hosting.
Please use the following versions or higher as much as possible:
| Dependency | Version |
|---|---|
| Unity | 2022.3.22f1 |
| VRChat SDK - Worlds | 3.10.3 or higher |
| VRChat SDK - Base | 3.10.3 or higher |
Lower version environments may also run, but fatal errors may exist.
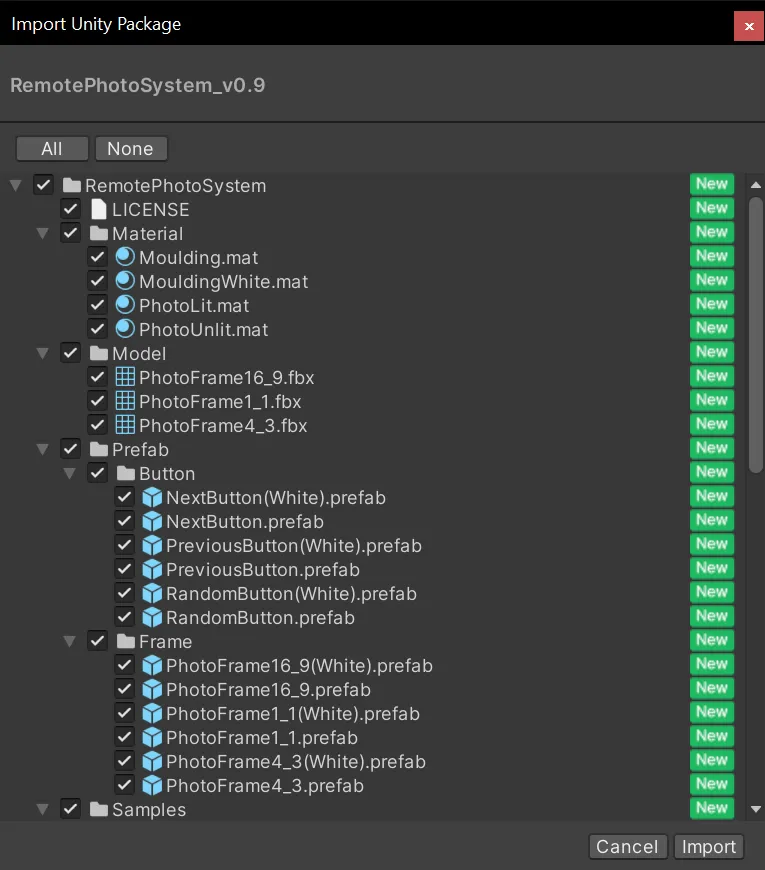
1. Import RemotePhotoSystem
Section titled “1. Import RemotePhotoSystem”Import the unitypackage of RemotePhotoSystem into your Unity project.
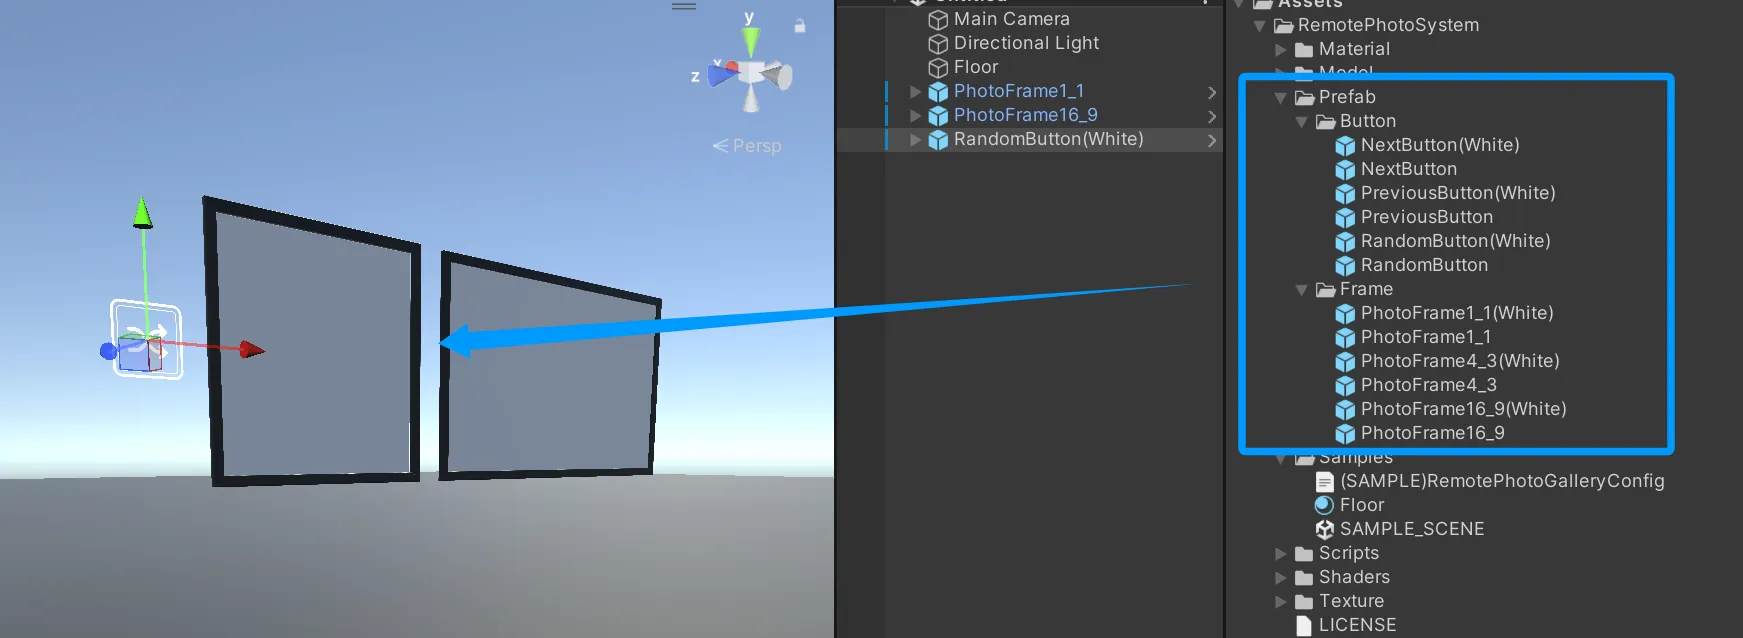
2. Place frames and buttons
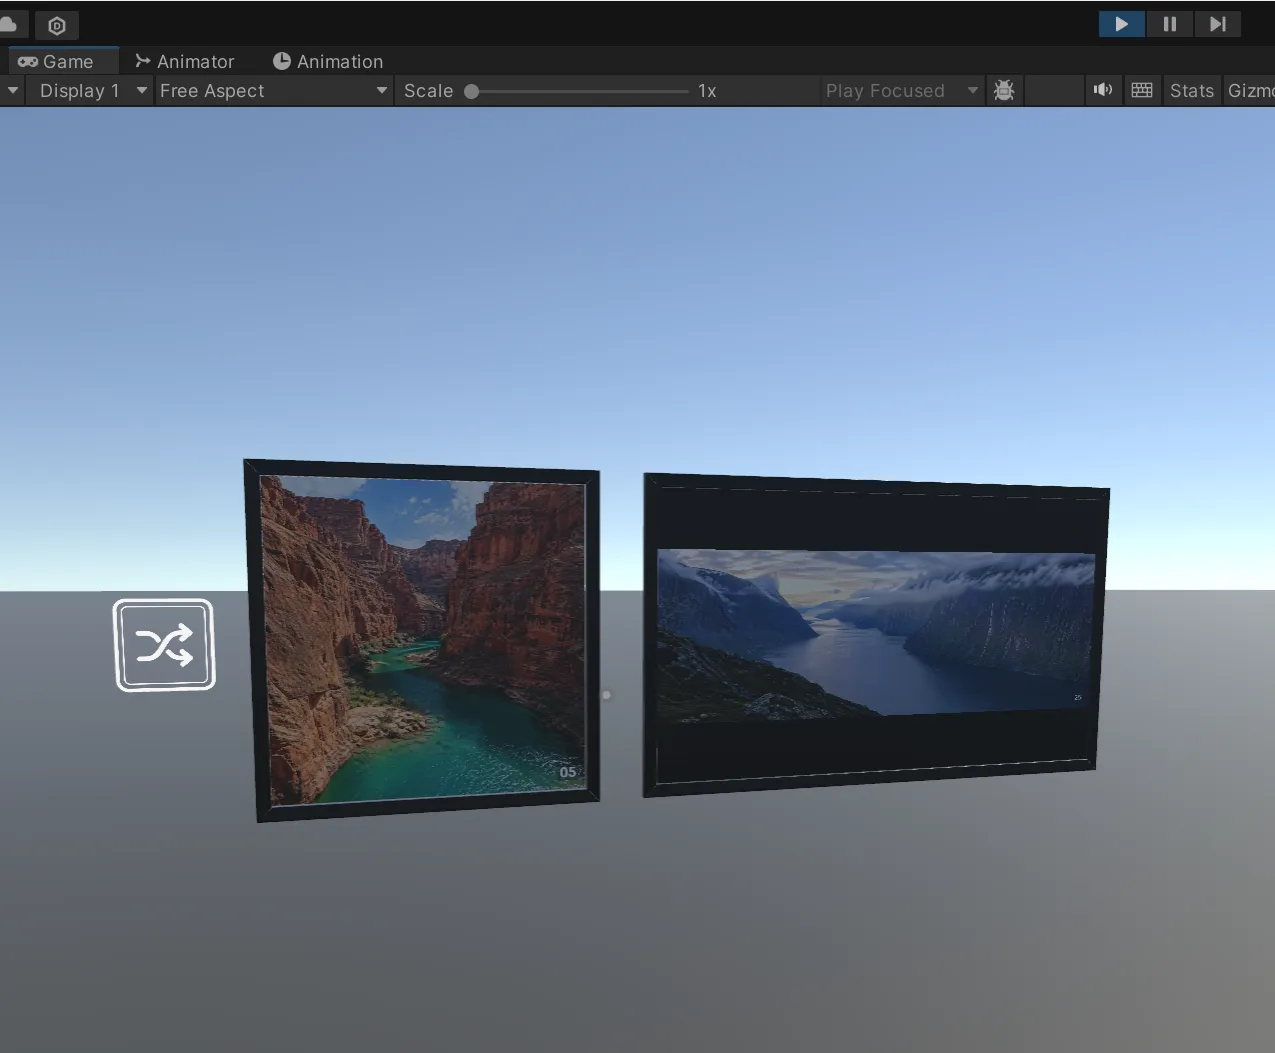
Section titled “2. Place frames and buttons”Find the frame and button prefabs in the Prefab folder, and drag them into the scene.
This tutorial only demonstrates one random button. Random mode and sequence page mode should not be mixed in the same Manager.
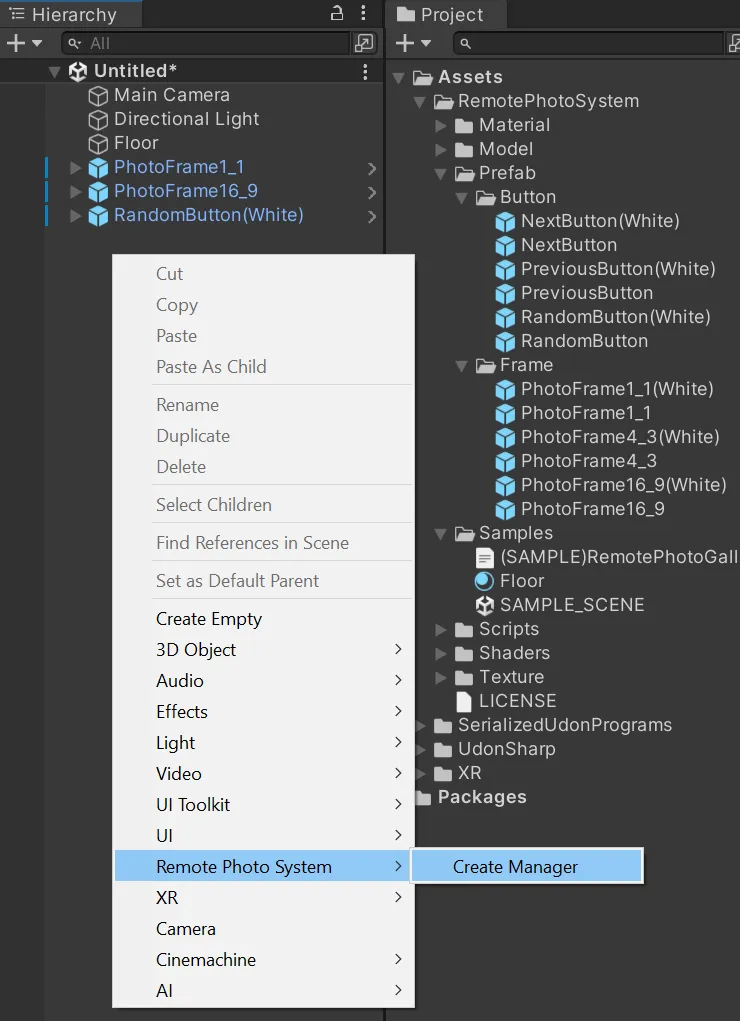
3. Create Manager
Section titled “3. Create Manager”Right-click an empty area in Hierarchy, then choose:
Remote Photo System -> Create Manager
This creates an object in the scene with a RemotePhotoManager component.
4. Use WebTool to create gallery JSON
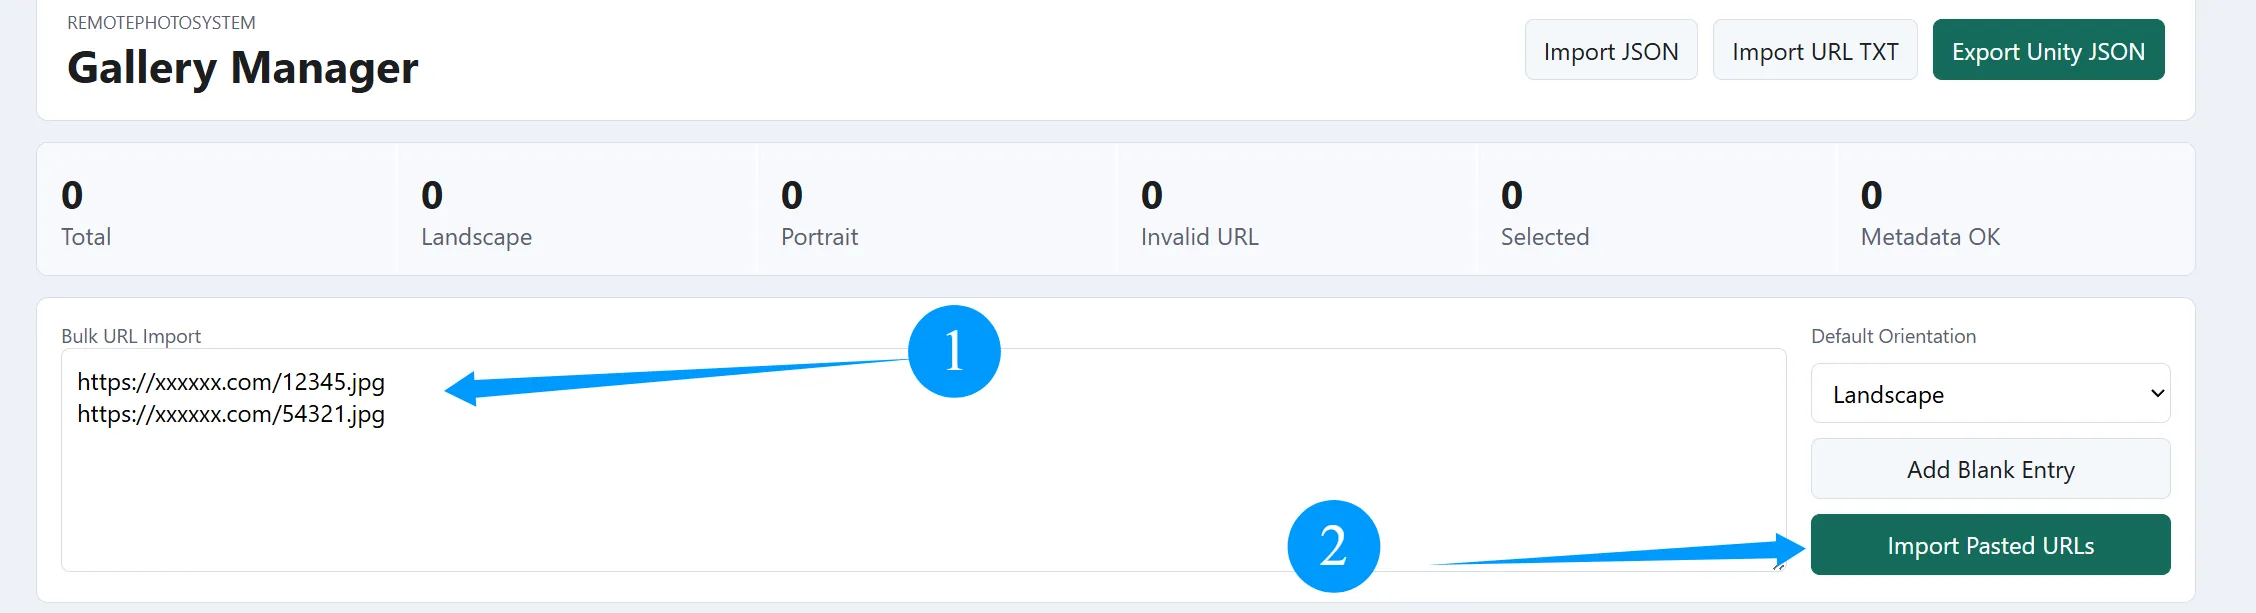
Section titled “4. Use WebTool to create gallery JSON”Open the WebTool folder in the project, and open index.html with a browser.
Paste image direct links into Bulk URL Import, one URL per line, then click Import Pasted URLs.
5. Automatically detect Landscape / Portrait
Section titled “5. Automatically detect Landscape / Portrait”Scroll down the page, set Probe Scope to Missing Metadata, then click Probe Image Sizes.
The web tool will try to read image dimensions and automatically fill Orientation.
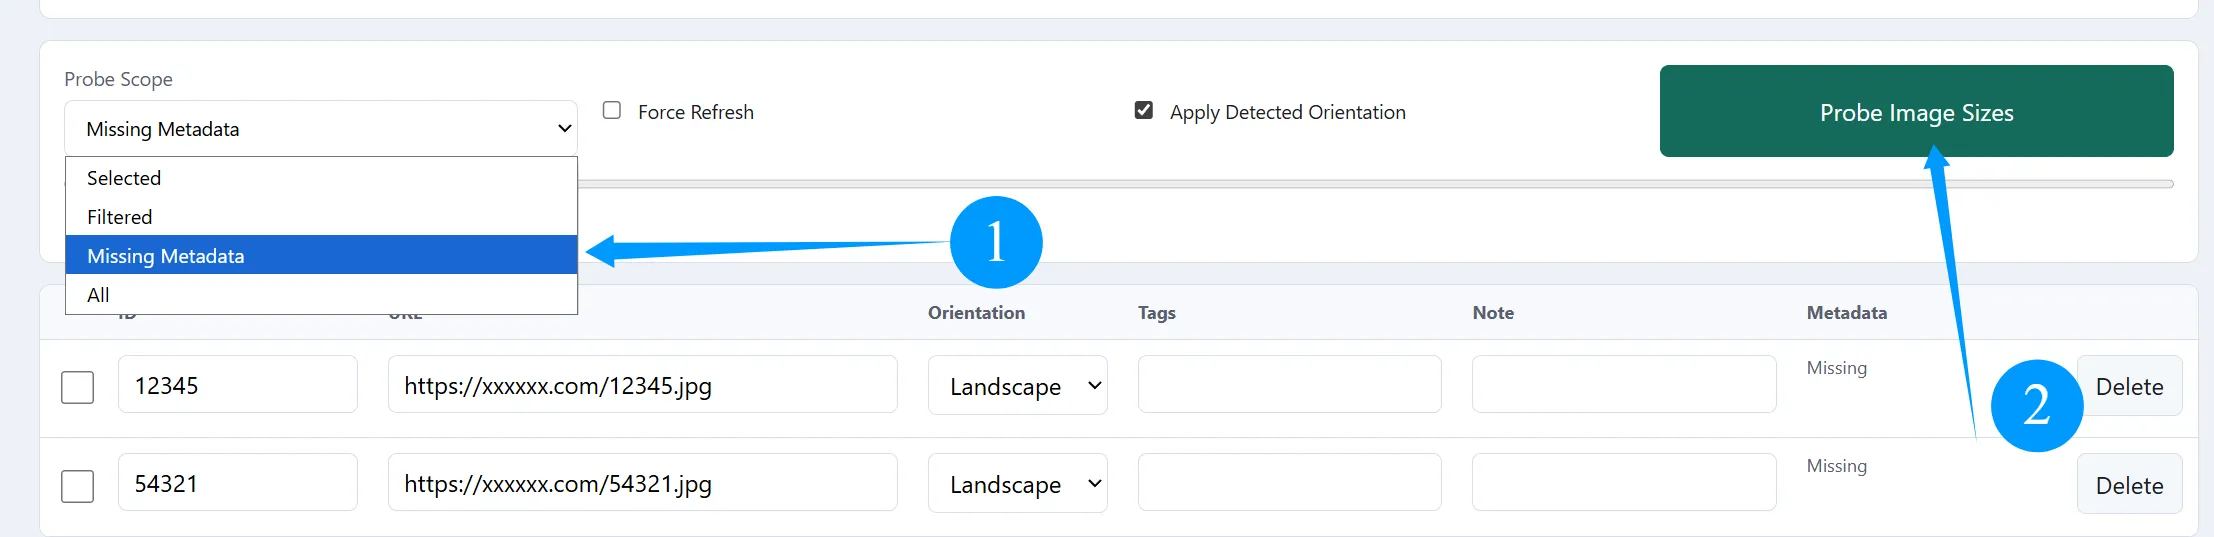
If some images cannot be detected automatically, manually set them to
LandscapeorPortrait.
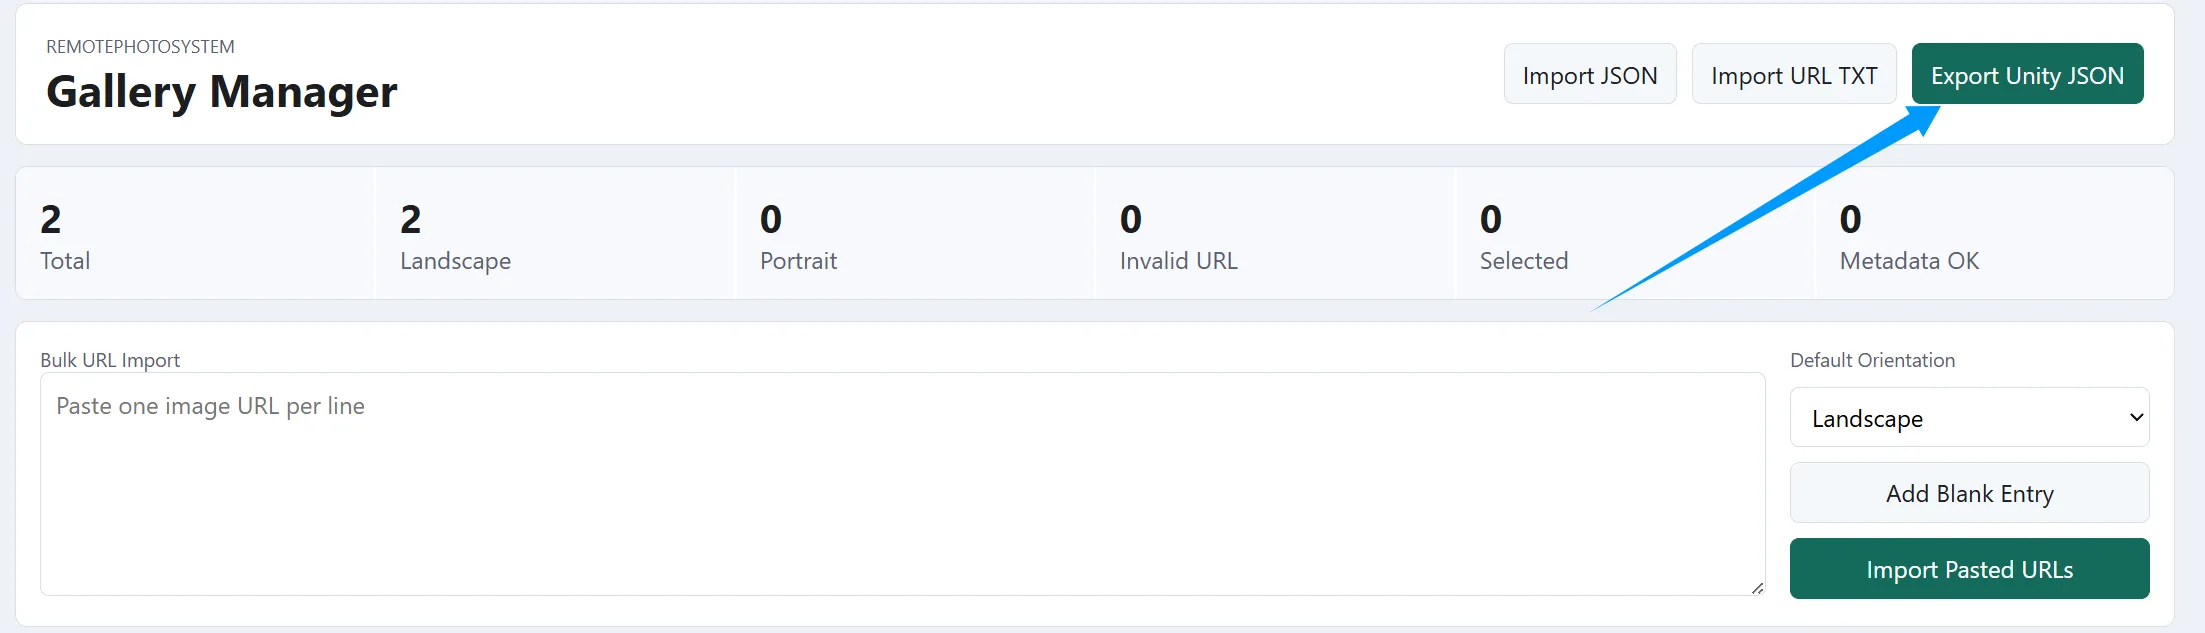
6. Export Unity JSON
Section titled “6. Export Unity JSON”After confirming that the image list has no issues, return to the top of the page and click Export Unity JSON in the upper-right corner.
The browser will download a gallery config file. Put this JSON file anywhere you like inside the Unity project’s Assets directory.
7. Import gallery into Manager
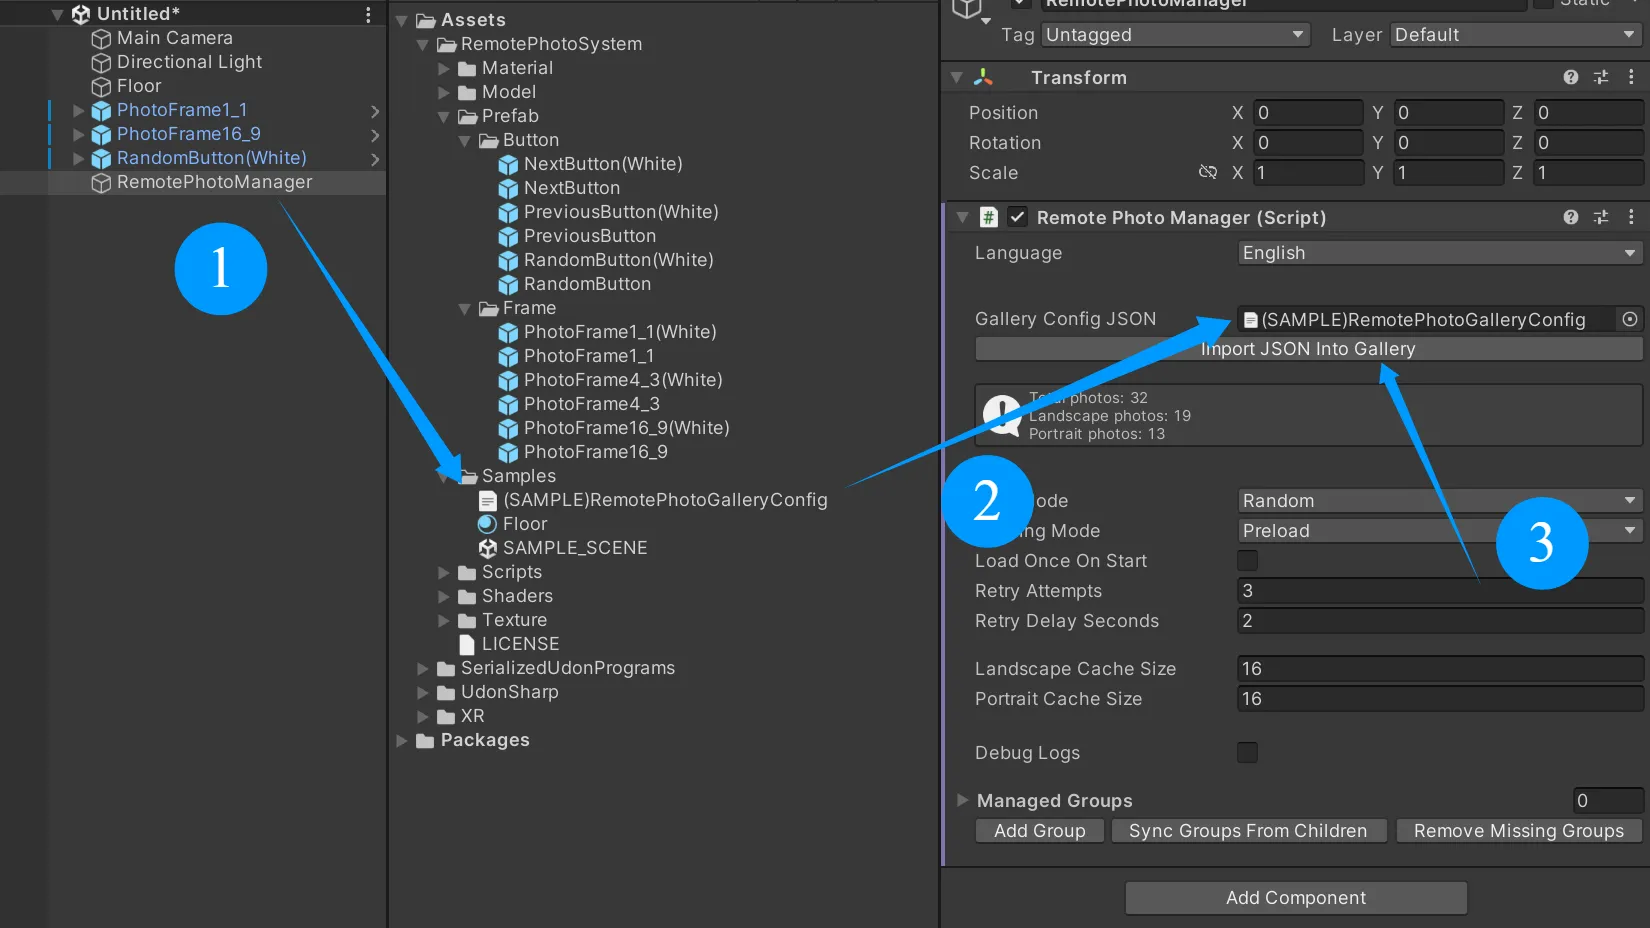
Section titled “7. Import gallery into Manager”Return to Unity and select the Manager created in step 3.
Drag the JSON file you just exported into Gallery Config JSON, then click:
Import JSON Into Gallery
If Total photos below becomes the number of images you imported, the gallery import succeeded.
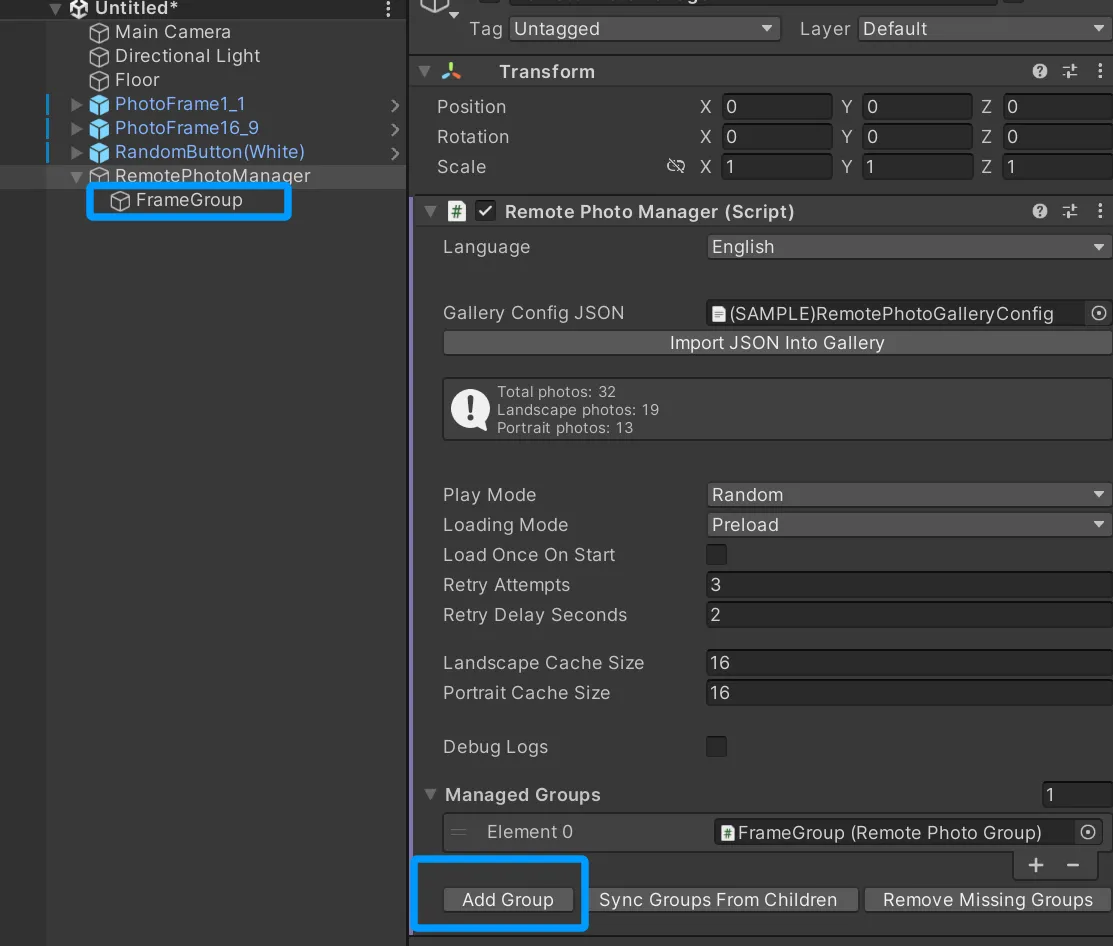
8. Create Group
Section titled “8. Create Group”Find Managed Groups at the bottom of the Manager Inspector, then click:
Add Group
The system will create a new child object under the Manager and automatically attach RemotePhotoGroup.
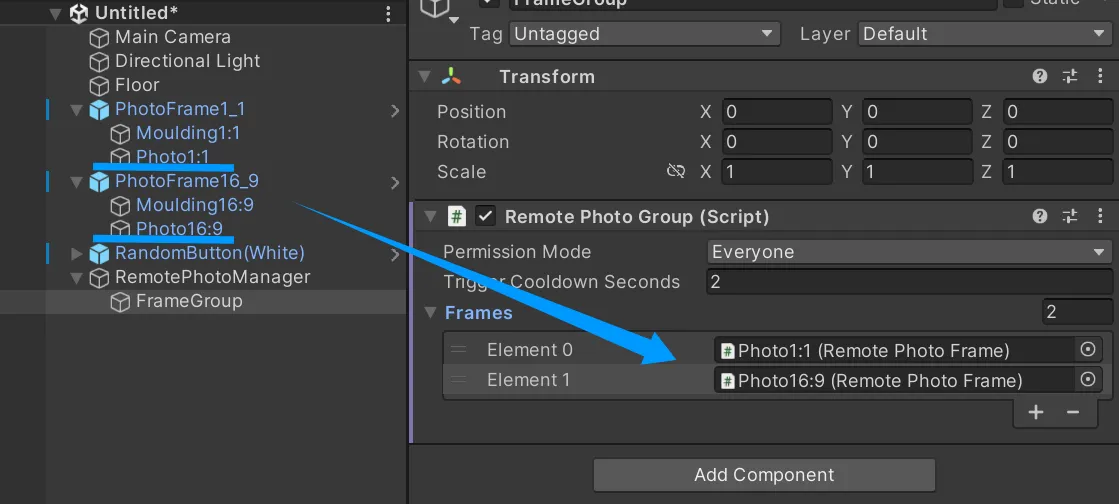
9. Add frames to Group
Section titled “9. Add frames to Group”Expand the frame prefab hierarchy and find the Photo child object that actually displays photos.
Select the Group you just created, and drag these Photo child objects into the Group’s Frames list.
The order of
Framesis the photo assignment and loading order. At first, just place them in an intuitive order such as left to right or near to far in the scene.
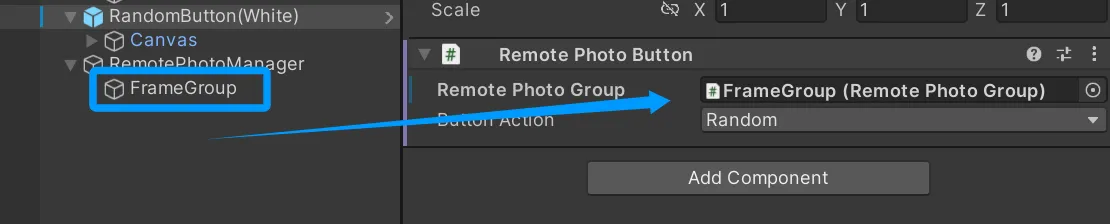
10. Connect button
Section titled “10. Connect button”Select the button object and drag the Group you just created into the button component’s Remote Photo Group.
Then confirm that Button Action is set to:
Random
11. Runtime test
Section titled “11. Runtime test”Enter Play Mode and click the button.
If the configuration is correct, the frames will start loading remote images.